Thursday, December 22, 2016

Chilli Review 2016


A review of my Chilli Growing Year 2016


I grew 57 Chilli Plants this year and as usual, this included some new varieties...


Also new for me was the use of my Growlight!! I used this for keeping the chilli plants under once they were germinated. Has to be said that it is a brilliant piece of kit to have!

One noticeable thing for me was that the plants were much more bushy and rounded having been under the lights.The Growlight also allowed me to keep more plants on the go early in the year inside, and they flourished under it!


It was also (although late in the season when I acquired it) great to have the temperature controlled Propagator with grow-lights. Being able to control and adjust the temperature made a difference for germinating some of the slower/harder to germinate “hot” varieties!!


Crop wise I had my best returns for years, and this I am putting down to:

1. The Growlight

2. Some careful pinching out

3. A policy of using bigger final buckets for them and giving them a handful of chicken manure pellets when transplanting into their final buckets/pots.


In 2016, I grew the following chilli varieties and grew 57 plants in total!! Individual plant numbers are in brackets..

· Anaheim (6) - Always a favourite of mine and cropped really well in bigger pots compared to previous years.

· Antohi Romanian (2) - These are seeds obtained a few years ago from Irish Seed Savers and are described as “Pale yellow ripening to red; 4" by 2" sweet fruits; early & a heavy yielder”. I find they are relatively mild and are nice to mix with the hotter ones for sauces and/or to pickle on their own. They cropped well in 2016 in large pots.

· Cayenne (3) The old reliable! Cropped very well in larger pots.

· Chilaca (5) – Plant has a spreading habit and produces lovely glossy green fruits that eventually turn brown if left on the plant. Great crop in 2016! I left many of these on the plants to turn brown. Those attacked by greenfly, I stripped and dried the fruits in my plumbing room. I then ground them into a powder and got a nice jar of brown chilli powder J

· Fuego Ibrido F1 (3) – This is an F1 variety that bears plentiful long red chillies. Great crop in 2016! Great with pasta dishes etc

· Habanero Orange (3)- Good crop in 2016 from this hot chilli plant. Always later to flower and fruit than others...Still growing strongly in my home office room as at 22/12/2016!

· Hopscotch (1) – Lush green plant that had loads of late developing and ripening fruit. Great crop!!

· Hungarian Black Wax (2) – These probably didn’t get the care or appropriate growing space they deserve, so ended up being the worst performer of 2016.

· Jalapeno (12)- I grow so many of these because I love Jalapenos and I love pickling them. They cropped very well in 2016 in large pots.

· Jalapeno Purple (4) – New for 2016 and an excellent addition. Great cropper and strong growing plant. A keeper! I saved seed from this variety this year. 2 plants still growing in spare bedroom as at 22/12/2016.

· Lemon Drop (2) – Always slow to get going (for me anyway) but arrives late with loads of bright yellow fruit. They cropped very well in 2016 in large pots. Trying to overwinter one of these.

· Manzano (2) – New for 2016. Sowed later than the other varieties. Sprawling in growth and late to fruit with fruit appearing late August. Fruit was still green as at Oct 121st

· Mucho Nacho (3) – Jalapeno like pepper but fatter and thicker. Good crop.

· Ohnivec (3) – New for 2016 with seeds bought from Real Seeds. An excellent cropper of very hot (when red) fruits that are large, long and striking in appearance as they cycle through their colour changes! They cropped very well in 2016 in large pots. Will be growing again!!

· Padron (1) – Very suited to the larger final pot when compared with previous year’s fruit.

· Palivec (4) - New for 2016 with seeds bought from Real Seeds. An excellent cropper of long “goats horn” style chillies. Striking plants when in fruit. They cropped very well in 2016 in large pots. Will be growing again!!

· Sante Fe (2) – Approx 5” long and ripen from greenish yellow thru to Red. Flavour varies from mild to moderate but some can be very hot! . They cropped very well in 2016 in large pots.


In summary, all of my chilli plants grew and fruited brilliantly in 2016. Highlights were the new Palivec & Ohnivec which are beautiful looking plants with their large sized fruits as they cycle through the colour changes....Purple Jalapeno was also a keeper.


I will try to overwinter Habanero Orange, Hotscotch, Lemon Drop & the Manzano I think..

Saturday, November 12, 2016

Winter Onions Planted


So, a little bit later than usual, I finally got round to planting my winter onions on Saturday (November 12th)
I usually try to have them in by the end of October, but didn't get around to it. I think the current mild weather and of the last few weeks will help me out though.
I planted my old reliable RADAR and some ELECTRIC RED.
Additionally, I planted out some of my saved Potato Onion bulbs and some saved Elephant Garlic cloves and rounds. The rounds were from last year's crop that, for some reason, didn't form into cloves.
I also planted some of my saved garlic cloves that have been grown from Garlic Rounds that were harvested in July 2015 and sown again in Oct 2015. The idea is that they become somewhat acclimatised/localised from growing them from rounds and perform better over time..we'll see..


I also planted the veggie bag below with some smaller Radar & Electric Red bulbs. This bag was well fertilised over the last few weeks with rabbit poo.

Friday, November 11, 2016

Chilli Vodka


Chilli Vodka is a very simple thing to make, it seems to have gone out of fashion at the moment. You can us any chillies you fancy, deep red chillies with give the Vodka a nice colour if left long enough.
I was given a couple of bottles of Inferno Vodka 5 years ago, we drank one and save the other, as you can see the colour from the  hydroponically grown 911 chillies has tinted the Vodka.
Let six chillies (maybe Jalapenos) ripen to red, then harvest. Cut off the Peduncle (the stem) and Calyx (the green bit that holds the stem to the flesh), then cut in half length-ways and remove the seeds and Placenta (The white bit between the seeds and the flesh). If they were large peppers cut again into quarters, they need to fit into the bottle.
Now comes the hard part, open a bottle of good quality Vodka and remove a glass full (don’t drink it yet), push the slices of jalapeno into the bottle and then top the bottle backup from the vodka you did not drink earlier, seal up the bottle. Now if there is any leftover you can now drink this.
You will need to keep this for at least 8 weeks for the vodka to take the flavour from the chillies, it is a great drink to make at the end of the chilli season ready for a winter warming.
Alternatively, some people don't de-seed the chillies and just leave them whole but prick them all with a fine pin


Tuesday, November 8, 2016

Garlic Planted in Bed 3 & Bed 6


BED 3: Sowed 2 beds of Garlic today (Sunday, November 6th)
One bed is 4 rows of Printanor which is a French grown softneck. This is a new one for me to grow  and it is described as "a reasonably new variety with large bulbs filed with plump tasty cloves".
We shall see in Summr 2017!


I also covered the bed over with Enviromesh to keep our cat off it (see above).
To make this easier in futute, I need to add some more support on the top of these beds....


BED 6: On Bed 6 I planted 4 rows of garlic cloves; one each of Solent Wight, EPW, Sprint & Messidrome.


Hardnecks planted so far are: EPW, Sprint
Softnecks planted so far are: Printanor, Solent Wight & Messidrome

I also have some "saved" cloves that have been grown from Garlic round over the last couple of years with the hope that they become "naturalised" to my local environment...
I have not replanted these yet...Pending Job!!


Hardneck Garlic:

Hardnecks will store for three to six months on average so are grown for early winter usage.
There are many different varieties of these; ones I have grown are Early Purple Wight (EPW), Sprint and Vayo.

 Many of these hardnecks have some colouring to them such as streaks of purple, red or brown.
They are valued for their high allicin content and great flavour that holds up in cooking.
Hardnecks can be a little challenging when separating the cloves as they have a fair amount of "parchment" or the papery skins you have to peel away to get at the "meat". They tend to have a inner circle of large cloves with a few smaller cloves on the outside.


Softneck Garlic:

Softneck garlic’s advantage is that they store longer, up to nine months.
They generally have numerous cloves in a head. These are normally white and the garlic you see in the supermarkets is usually a Softneck variety. Flavour is good and can be from mild to very strong.
The necks are more pliable than hardneck varieties so they make good candidates for braiding.
Examples I have grown are Iberian Wight, Solent Wight, Jolimont, Messidrome & Printanor (new for 2016)

Wednesday, October 12, 2016

Chilli Oil


Chilli oil can transform a meal, taking it from bland to deliciously spicy in one pour. It goes great with things like pastas, risottos, stir fries, seafood, and dozens of other meals. While it’s sold in most grocery stores, it's also simple to make at home. If you have red chilli pepper flakes and olive oil, you’ve already got everything you need. Spend a couple of minutes creating this easy yet game-changing recipe, and your stir-fries and sautées will never be the same.

Standard Ingredients:


  • 1 cup (236.59 mL) vegetable, peanut, or olive oil
  • 2 teaspoons (9.86 mL) chilli flakes
  • 2 to 3 whole dried chillies


Select your oil. Before deciding which oil to use for this recipe, you should determine that you’ll be using the chilli oil for. If you’re going to be cooking with it, it’s great to use more neutral oils like vegetable or peanut oils. However, if you’re going to be using it as a topper for dishes, you might want to select something a bit more flavorful. In this case, a great olive oil or sesame oil can add an interesting flavor.[3]


How to make Chilli Oil


Homemade Chilli Oil


Monday, October 10, 2016

Tomato and Chilli Relish


Picked a load of tomatoes at the weekend. Didn't want them to go to waste, so I decided to make some more Tomato and Chilli Relish. I used an old recipe ( I may have put it on previous posts!) and adapted it a little.


Ingredients used:

  • 1000 g very ripe tomatoes
  • 8 cloves garlic, peeled and crushed
  • 8 red chillies
  • 1 Red Pepper
  • 3 tsp finely chopped ginger
  • 60 ml fish sauce
  • 400g golden caster sugar
  • 60g Jam Sugar
  • 200 ml red wine vinegar
1. First I dice half the quantity of tomatoes and set aside.

2. Blend the remaining whole tomatoes (chop up any bigger ones) in a food processor along with the garlic, chillies, red pepper, ginger and fish sauce until the mixture reaches a pureé type consistency.

3. Pour the mixture into a saucepan together with the sugar and vinegar. Allow the sugar to melt before bringing to the boil. Stir slowly as you do this.

4. Once the mixture has reached boiling point, reduce to a simmer and add the remaining diced tomatoes.

5. Skim off any scum that forms with a metal spoon and cook for 30 -40 minutes, stirring from time to time to prevent sticking.

6. Pour the mixture into a warmed sterilised jar. Seal while still warm and label the jars when cold. 

Tuesday, October 4, 2016

Oven Drying Chillies to Flake/Crush


First step is to put gloves on!
Gently wash/rinse the chillies and pat dry with paper towels.
Cut stalks off and split chillies in half if necessary by slicing  down the long part.
Remove as many seeds as possible as you do this (remainder can be removed later)
Place greaseproof paper on a baking tray and place the chillies on top of it.
Put in oven at low heat (approx 100) and monitor carefully until dry/crispy.
First I left them in for 20 mins and then you should check them every 5 mins or so!


After you are satisfied that they are completely dried out, you can add them to a spice grinder and away you go. Be careful of dust from the grinding process as it is easy to inhale!!
Below is the result of my first batch of drying and grinding......


Red Habanero


Hotter chillies such as the Habaneros are slower to flower and fruit than the Annums.
Often find them only taking off in September & October.
The above is 2 Orange Habanero plants and they are flowering away now and have some lovely orange fruits on them..
Will probably save seed from these as they have been grown in isolation.

Friday, September 30, 2016

Spicy Chilli Relish & Hot Chilli Sauce


I have lots of chillies still to use up and so today I made these..

Spicy Chilli Relish

Ingredients:


12 Chillies (I used 2 Lemon Drop, 3 Hot-scotch, 6 Ohnivec and 1 Sante Fe)
1 Large Onion (chopped roughly)
1 Carrot (sliced)
3 tbsp Golden Caster sugar
1.5 Cups of Water
½ tsp of Cumin
½ Cup Cider Vinegar
½ Cup Red Wine Vinegar
1 Large Tomato (I used Brown Sugar, but any decent sized tomato with some flavour will do)

Add the chopped onion and carrot to the water and vinegar mix in the saucepan.
Add the sugar and stir until dissolved on a low heat. Gradually increase heat and when approaching soft consistency, add the roughly chopped tomato, chopped chillies and cumin powder.
Simmer until all have a nice soft consistency keeping a lid on the saucepan.
Add to the blender and whizz up! Taste and add to sterilised jars.


Taste Test> This is nice and tangy with a nice after kick to it!! Slightly thicker than the one below, this would fall into a chilli preserve/relish category whereas the one below is more of a chilli sauce..


Spicy Chilli Sauce

Ingredients:

12 Chillies
1 medium Onion (chopped roughly)
1 Lime juiced
2 and ½ tbsp Golden Caster sugar
1 Cup of Water
1 tbsp of Fish Sauce
1 tbsp of sliced Ginger
250ml White Vinegar
250ml Cider Vinegar

Add the sugar to the water and vinegar mix in the saucepan and stir until dissolved on low heat. Add the chopped onion, lime juice, ginger and fish sauce and increase heat.
When approaching soft consistency, add the roughly chopped chillies. Simmer until all have a nice soft consistency keeping a lid on the saucepan.
Add to the blender and whizz up! Then add to sterilised bottles.

Taste Test> A nice sweet to sharp taste..This is a chilli sauce and so more suited to bottles. 

Thursday, September 15, 2016

Handy Tip..Saving Tomato Seeds


  1. Rinse tomatoes in water to remove dirt before harvesting seeds. Cut off open or damaged parts of fruit. We collect tomatoes in five gallon buckets then fill them with water. Cleaning any dirt off becomes a natural sweeping motion with your hands as you grab tomatoes from the water.
  2. Cut open ripe tomatoes one variety at a time and squeeze the pulp, juice and seeds into a container. If you have strong hands, you may crush the tomato in a five gallon bucket. Try to develop skill holding the tomato right side up and opening the tomato from the bottom blossom, and, with your fingers, then milking the germplasm gel which contains the seeds off the central column. This is the fastest method.
  3. Pour into a container with a lid. Do not add water as a substitute for tomato juice since dilution slows fermentation.
  4. Label and set aside the containers for three days at a temperature not more than 70°F (21°C).
  5. Stir the fermenting juices to submerge the pulpy material, once or twice daily. This prevents the build up of mold which is not harmful to the seeds but may discolor them.
  6. After three days decant. Pour into a larger container that allows you to add three or more times the volume of water and pour off the pulpy water but not the seeds at the bottom. Viable tomato seeds will sink. Repeat two or three times until seeds are clean. Note: not all viable seed varieties sink in water.

Monday, September 12, 2016

Roasted Tomato Sauce


A selection of harvested tomatoes


If you have (almost) more tomatoes than you know what to do with, this sauce is not only delicious and enormously versatile, but in its freshly sieved state – that is, before you add the sugar and vinegar – it freezes brilliantly for up to six months. Makes 1.4 litres.

3kg ripe tomatoes, halved
5-6 garlic cloves, peeled and thinly sliced
3-4 sprigs fresh thyme
4-6 tbsp rapeseed or olive oil
Salt and freshly ground black pepper
1-2 bay leaves
A little light muscovado sugar
A little cider or white-wine vinegar
Ground mace or nutmeg

Heat the oven to 180c. Lay the tomato halves cut-side up in a single layer in a couple of large roasting tins. Scatter over the garlic and thyme. Trickle over the oil and season generously.
Roast for an hour, or until the tomatoes are soft and starting to brown around the edges. Place a sieve over a bowl and, working in batches, tip the tomatoes into the sieve and rub them through with a wooden spoon. Discard the skin and pips. At this point, you have the option to freeze the sauce to keep you going through the winter – use it as a base for soups, stews and pasta sauces, or swirl it on top of pizza.
Measure the sieved puree volume, then put it in a wide saucepan with the bay leaf (or leaves). For every 500ml of puree, add a heaped teaspoon of sugar, a tablespoon of vinegar and a pinch of mace. Bring to a simmer and cook gently, stirring often, until reduced by half to form a thick, glossy sauce. Adjust the sugar/vinegar balance, if necessary, and season to taste.


Sunday, September 11, 2016

Hot Chilli Chutney


Hot Chilli Chutney

  • 450g chillies (I used mixed chillies)
  • 1 onion, finely chopped
  • 6 cloves garlic, crushed
  • 4 tablespoons ground cumin
  • 2 tablespoons turmeric
  • 25g root ginger, peeled and grated
  • 1 tablespoon salt
  • 2/ thirds of a cup of olive oil
  • 3 tablespoons sugar
  • 1 and a quarter cups white vinegar
  1. Finely chop chillies, including seeds.
  2. Mix together the chillies, chopped onion, garlic, cumin, turmeric, ginger, salt and oil.
  3. Transfer to a heavy based pan and allow fry relatively slowly for 15 minutes, stirring often to prevent sticking.
  4. Add sugar and vinegar allowing sugar to dissolve and then bring to the boil. Cover pan and boil for 15 minutes stirring occasionally. Turn heat down and allow to cook for a small while longer.
  5. Pack into sterilised jars, then seal. If you have button topped lids, make sure the button pops down when the jar has cooled to ensure a proper seal.
This should keep for a long time, but make sure that once opened, that you keep it in the fridge just to be sure. I reduced the amount of oil from the original recipe because it seemed far too runny. 
The above made 2 and a half jars of a nice tangy chutney. You should probably give it a quick stir each time before use given the oil content. Very yummy tho!!!

Added note>>> Probably worth adding grated lime zest to this as a taste experiment..


If you find it is too hot (as in spicy), add some lemon or lime juice to cool it down a bit...

Good Onion Harvest

I usually have a good crop of large sized onions and this year is no exception thankfully...Harvested a couple of weeks ago and now drying...


Above is a selection of my onion harvest that is on racks for drying (if it would stop raining!)

Kohl Rabbi & Caterpillars

My kohl rabbi plants were getting on fine until the cabbage white butterfly paid a visit...Didn't have them covered unfortunately...Lesson learned although they have not been affected in previous years...

Pumpkin

Look what I found when doing some rummaging around in one of the beds that has 2 courgette plants, a pumpkin and another winter squash whose name I forget...
Pretty big pumpkin which I am sure the kids will love...

Friday, September 9, 2016

Jamie Oliver's Cheeky Chilli Chutney

Jamie Oliver's Cheeky Chilli Pepper Chutney


Haven't made this one before, so am tempted to try it this year. Have loads of chillies this year to experiment with..

Sunday, September 4, 2016

Belizean Hot Chilli Sauce

Definitely a taste of carrots followed by a kick!!

I made 4 jars of this last Saturday (Sept 3rd) and on tasting it you initially get the tang of carrots but straight after comes the chilli kick. Might be more suited to a bottles than jars, but they are staying as is now!
Belizean Chilli Sauce
Belizean Chilli SauceBelizean Chilli Sauce Recipe

Friday, September 2, 2016

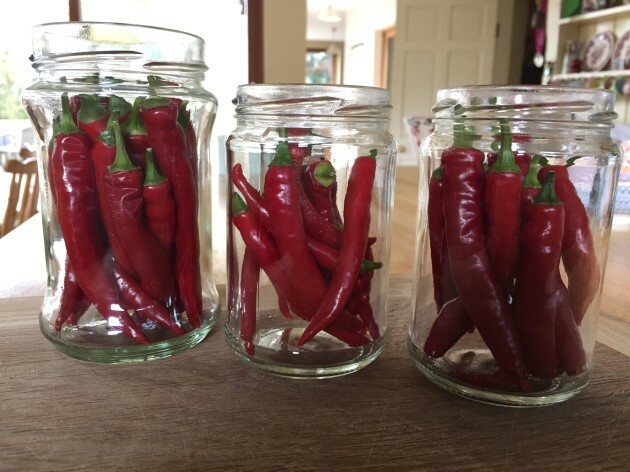
Pickled Whole Chillies

Recipe of the Week – Pickled Chilli Peppers

chilli peppers pickling
Shows off the full splendour of the chillies


I love my chillies and am always looking for ways to preserve them; here is another!Chilli peppers will freeze and dry quite well, but pickling is an approach that retains their colour and flavour excellently. The vinegar in the pickle is also believed to reduce the heat in them.
This excellent recipe is from Mark Diacono’s A Year at Otter Farm and takes just afew minutes to make. This recipe made three jam-jars of pickle, with the chilliesstanding upright in the jars.
Ingredients:
• 250g chilli peppers
• 500ml white wine vinegar
• a pinch of salt
• 100g caster sugar
• 3 bay leaves
• 12 peppercorns
Directions
Dissolve the sugar and salt in the vinegar in a pan over a medium heat. Add the bay leaf and the peppercorns and simmer for 10 minutes. Be careful that it doesn’t boil off.
Remove from the heat.
Pierce each chilli 5 or 6 times.
Put the chilli-peppers into sterilised jars and pour the hot vinegar over them to cover – then seal. Check liquid levels in jars after about a week.
Store in a cool, dark cupboard for up to a year. Keep in the fridge once opened.

Tuesday, August 30, 2016

Sunday, August 28, 2016

Nice big cabbage


Need to check to see what variety this was as it produced a brilliant and tasty head.

Thursday, August 25, 2016

Pickling Jalapenos

Below  is a link for a site I find useful when pickling Jalapenos..I try to pickle a mix of Green, Red & Purple Jalapenos and also usually add some Chilaca chillies too..

http://www.theyummylife.com/Pickled_Jalapeno_Peppers

Using excess Chillies hints

You can never have too many chillies in my opinion but just in case


http://blog.chilliupnorth.co.uk/chilli-growing/10-ways-to-use-excess-chillis/


Linking this from another Blog that I found.

Semaroh Sweet Peppers - great crop.

Picture
So this was the first year growing Semaroh Sweet Peppers for me. 
Got the seeds from Real Seeds (www.realseeds.co.uk)

The story behind this fine pepper is that in Czechoslovakia there was once a breeding program aiming to improve on the traditional chilli 'Palivec', and it actually generated a pair of new pepper varieties - one hot, the other sweet.
This one, Semaroh, is the sweet one. It is classed as being "early and productive, with lots of long sweet peppers with a goats-horn shape" and I can certainly attest to the productive part!!
Somewhat slow to ripen from the attractive early light green colour, these chillies adorn the plant which looks brilliant weighed down with them.
A definite must grow again for me in 2017.....
MUST ADD TASTE REPORT !!

Ohnivec chilli - great crop 2016

Picture

2016 was the first year growing Ohnivec chillies for me and what a surprise...
Plants were laden with long beautiful looking chillies as you can see. 
These will ripen to red eventually and will be very hot!!.

I got the seeds from Real Seeds (www.realseeds.co.uk)
Real Seeds say: "This large chilli from the Czech Republic is undoubtedly the biggest hot chilli we have ever had - loaded with fruit, almost a foot long and 2 inches wide, starting out a wonderful pale yellow, and ripening through orange to red.
They are completely mild when yellow, but don't say we didn't warn you - they really are extremely hot once ripened to orange."

A definite grow again in 2017!!

Sante Fe Chilli - great crop

Picture

Pickled Chillies, Hot Chilli Sauce and Smoky Chilli Sauce


Fruits of my labour!


A simple recipe for a nice Hot Chilli Sauce-

Ingredients

12 Habanero or similar Chilli
1 large Carrot (homegrown is best!)
1 Onion
3 tbsp Sugar
1 and a half Cups of Water
Pinch of cumin (optional)
Half a cup of Cider vinegar and half a cup of Red Wine vinegar


Pour the water and vinegar into a saucepan. Add the sugar at a low heat and ensure it dissolves. Chop up the carrot and onion and add to the pan.
Put the chopped chillies and cumin in the saucepan after 7 mins or so and simmer until soft consistency is achieved.
Put into a blender and blend until nice consistency.
Bottle it up and enjoy!!


And another one.....


Ingredients

Bottle of Cider Vinegar (500ml)
1 Lime
1 Cup of Water
2 and 1/2 Tbsp Brown Sugar
Garlic (4 or 5 cloves)
1 Onion
15 Chillies
1 Sweet Red Pepper


Pour the bottle of cider vinegar into a saucepan along with one cup of water.
Add a large splash of lime juice and 2 and a half tbsp of brown sugar.
Heat gently until sugar dissolves.
Add a roughly chopped onion and several cloves of chopped garlic.
Add the roughly chopped Chillies.
Simmer until soft. Taste!
Add to blender to whizz it up, taste it again and if happy, pour into sterilised bottles.

Chillies growing on Greenhouse Shelves. Excellent crop of Ohnivec, Palivec & Semaroh


Chilli plants on top lhs shelf- Sante Fe, Antohi Romanian & Anaheim

Picture

The Tunnel July 2022